A maintenance schedule with named owners and clear checklists
Monitoring tools that alert you before problems become outages
Step 1: Design a Mining Mesh Network That Survives Failure
A mining mesh network is a self-healing wireless system where each node connects to multiple others, so traffic reroutes automatically when one path fails. That redundancy is what keeps you running when equipment breaks or conditions change.
Redundancy and Failover Architecture
Design for failure from day one. Every critical link needs a backup path.
Use dual backhaul routes between underground zones and surface control rooms
Configure automatic failover so traffic switches without manual intervention
Segment your network so a fault in one area doesn’t cascade
Test failover quarterly to confirm it actually works
Battery-Powered Node Deployment for Remote Zones
Not every part of a mine has power. Battery-powered nodes let you extend coverage into remote shafts, tailings areas, and exploration zones without running cable.
Choose nodes with multi-year battery life and remote status reporting
Mount them high to reduce dust and water exposure
Schedule battery checks into your preventive maintenance cycle
Pair with solar where sunlight is available
Step 2: Choose Rugged Networking Equipment for Mining Environments
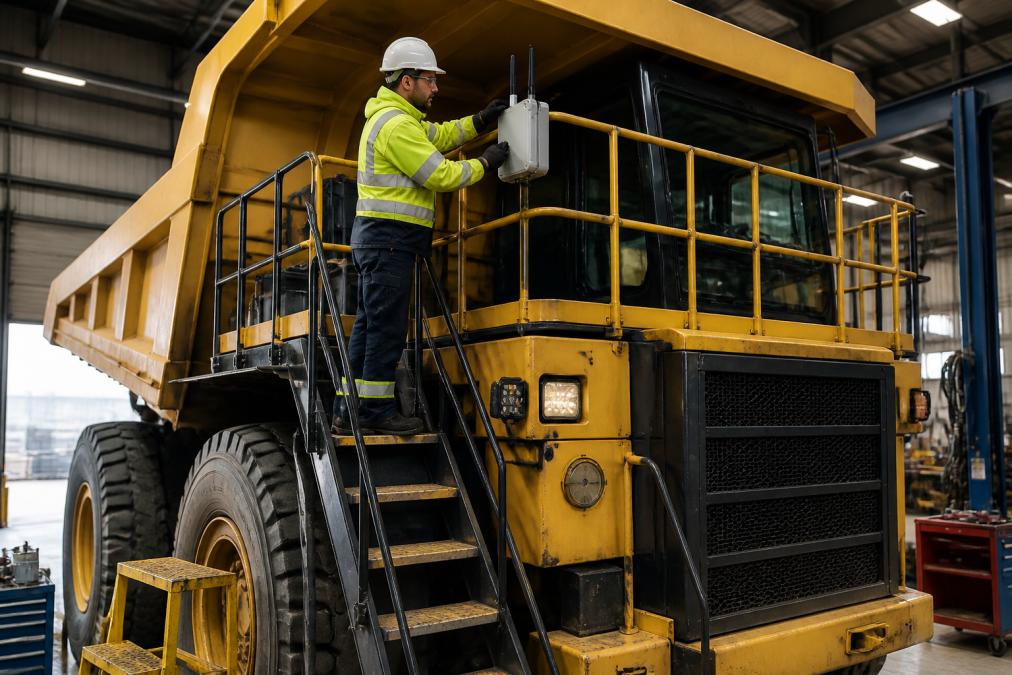
A network technician in high-visibility gear and hard hat mounting a ruggedized wireless access point on a large mining haul truck in a maintenance bay
Hardware Specifications That Matter Underground
Look for these specs when selecting equipment:
IP rating: IP66 or higher for dust and water resistance
Temperature range: rated for your site’s extremes, both hot and cold
Vibration tolerance: tested for mobile equipment and blasting
Sector antennas: focused coverage for long tunnels and pit walls
Ruggedized enclosures: metal housings that survive impact
Northwest Towers builds equipment specifically for these conditions. Our portfolio includes specialized antennas and rugged networking hardware designed for mining, construction, and other demanding industrial sites.
Pro TipThe spec sheet only tells part of the story. Ask vendors for field deployment references in similar environments. A unit that works in a warehouse may fail in a blasting zone.
Step 3: Reduce Wireless Signal Interference in Mines
Wireless signal interference in mines comes from three main sources: heavy equipment, competing frequencies, and the physical environment itself. Managing all three is essential for reliable connectivity.
Securing OT in Mining: Network Resilience, Segmentation & Cyber Challenges
Learn with Cisco
Environmental Harshness and Electromagnetic Noise
Underground mines are hostile to radio signals. Rock walls absorb and reflect. Heavy machinery generates electromagnetic noise. Blasting shakes everything loose.
Here’s how to fight back:
Site survey first: measure actual interference before you deploy
Use licensed spectrum where available to avoid congestion
Position access points to minimize signal propagation through rock
Shield critical cables from electromagnetic interference
Monitor packet loss continuously to catch new interference sources
Step 4: Build a Preventive Maintenance Schedule
Preventive maintenance is the difference between a network that runs for years and one that fails every quarter. Build a schedule and stick to it. But a schedule alone is not enough, you need to understand why each task matters and what failure it prevents.
The Core Maintenance Calendar
Task
Frequency
Owner
Failure It Prevents
Visual inspection of all nodes, mounts, and cable glands
Monthly
Field tech
Water ingress, loose connectors, physical damage
Firmware and security updates
Quarterly
IT/OT team
Known vulnerabilities, protocol bugs
Failover and backup path testing
Quarterly
Network engineer
Silent redundancy failures
Battery and power system check (voltage, charge cycles)
Semi-annually
Field tech
Unexpected node shutdowns
Full site survey and RF analysis
Annually
Network architect
Coverage drift from new equipment or rock movement
Spare parts inventory audit
Semi-annually
Operations
Extended downtime waiting for replacements
Connector torque and weatherproofing check
Semi-annually
Field tech
Vibration-induced loosening, moisture intrusion
Antenna alignment verification
Annually
Network engineer
Gradual signal degradation
Assign clear owners. A schedule without accountability is just a wish list.
Condition-Based Triggers That Supplement the Calendar
Calendar-based maintenance is necessary but not sufficient. Underground conditions change faster than any quarterly cycle. Add these condition-based triggers to your monitoring platform:
Receive signal strength (RSSI) drop of 6 dB or more on any node over a 24-hour window, investigate before it becomes a dead zone.
Packet loss exceeding 1% on any backhaul link for more than 15 minutes, check for new interference or a failing radio.
Battery voltage below the manufacturer’s threshold, schedule replacement before the next production shift.
Temperature readings outside the rated range, inspect enclosure seals and ventilation.
Retransmission rate spike, indicates hidden interference or a degrading antenna connection.
Spare Parts Strategy
Every hour of downtime costs production. Keeping the right spares on site is cheaper than expedited shipping.
Critical spares (keep 2 of each): access points, mesh nodes, power supplies, antennas, PoE injectors.
Test equipment: spare battery packs, a portable spectrum analyzer, and a laptop with the latest diagnostic software.
Watch OutSkipping firmware updates leaves known vulnerabilities open. In operational technology environments, that’s a direct security risk, not just an IT concern. Schedule updates during planned production pauses and always test on a non-critical node first.
Documentation and Handoff
A maintenance schedule is only as good as its records. Use a simple CMMS (computerized maintenance management system) or even a shared spreadsheet to log:
Date and technician for every inspection
Any anomalies found and corrective action taken
Firmware versions and update history
Battery replacement dates and expected remaining life
Step 5: Set Up Real-Time Monitoring and Diagnostic Tools
Real-time monitoring catches problems before they become outages. You can’t fix what you can’t see.
Your monitoring stack should cover:
Signal strength across every access point and node
Latency and throughput on critical paths
Packet loss trends over time
Power and environmental status for remote sites
Uptime reporting for management and compliance
Edge Computing for Latency Reduction
Edge computing processes data close to where it’s generated, cutting the round trip to a central server. For time-sensitive mining operations like autonomous haulage or collision avoidance, that latency reduction matters.
Deploy edge nodes at each major zone
Run critical control logic locally
Sync to central systems on a schedule
Keep edge devices on the same monitoring platform
This also reduces bandwidth pressure on your backhaul links.
Step 6: Plan for Post-Blast Network Recovery
Blasting is part of mining. Your network has to recover fast afterward. Most competitors treat this as a footnote, a single bullet about checking equipment. That is not enough. Post-blast recovery is a distinct operational workflow that deserves its own playbook.
Pre-Blast Preparation (T-minus 60 Minutes)
Recovery starts before the blast. A few simple steps dramatically reduce downtime:
Confirm all nodes are online and reporting via your monitoring dashboard. Note any that are already degraded.
Capture a baseline snapshot of signal strength, latency, and packet loss for every node in the blast zone.
Switch critical traffic to redundant paths outside the affected area if your architecture allows.
Notify the blasting crew of any nodes that must not be disturbed (e.g., those mounted on walls that will be shaken).
Verify backup power on battery-powered nodes is sufficient for at least 24 hours of post-blast operation.
The Blast Window (T-minus 0 to T-plus 30 Minutes)
During and immediately after the blast, your network will likely experience:
Physical displacement of nodes, antennas, or cables
Dust ingress into enclosures and connectors
Temporary signal loss due to rock movement and airborne dust
Power interruptions if cables are damaged
Automated Recovery Mechanisms
Manual recovery is too slow. Configure your network to heal itself:
Mesh self-healing: ensure nodes are set to automatically re-establish links with any available neighbor. Test this quarterly by simulating a node failure.
Automatic reconnection: configure radios to retry association indefinitely with exponential backoff. Do not set a maximum retry limit that could leave a node offline permanently.
Redundant path activation: if your routing protocol supports it, set failover to occur within 3 seconds of link loss.
Remote power cycling: for nodes with PoE, enable remote port reset so you can power-cycle a stuck node without sending a technician underground.
Post-Blast Physical Inspection (T-plus 30 Minutes to 4 Hours)
Once the area is declared safe, a field technician should perform a structured inspection:
Visual check of all mounts, enclosures, and cable runs in the blast zone.
Connector check for looseness, moisture, or dust. Re-torque and reseal as needed.
Antenna alignment verification, blasts can shift directional antennas by several degrees.
Battery voltage check on any battery-powered nodes.
Signal strength comparison against the pre-blast baseline. A drop of more than 6 dB indicates a physical problem.
Documented Playbook and Roles
Give every team member a clear role:
Blasting crew: report any visible damage immediately.
Field technician: perform physical inspection and minor repairs.
Network engineer: monitor automated recovery and intervene if a node does not return within 15 minutes.
Operations supervisor: decide whether to delay production if critical coverage is lost.
Key TakeawayPost-blast recovery is a process, not a reaction. Build it into your standard operating procedure so it happens automatically, not heroically. The goal is hours, not days. A network that takes a week to recover after every blast isn’t reliable.
For ruggedized nodes and antennas designed to survive blast vibration and dust, explore our Antennas and Network Equipment.
Common Mistakes That Cost You Network Uptime in Mines
No site survey before deployment: guessing at coverage leads to dead zones
Consumer-grade hardware: saves money upfront, fails in months
No failover testing: redundancy that’s never tested isn’t redundancy
Ignoring environmental factors: dust, vibration, and temperature kill equipment
Reactive maintenance only: waiting for failures instead of preventing them
No spare parts on site: every replacement becomes a multi-week delay
Skipping monitoring: you can’t fix problems you don’t see
Pro TipKeep at least one spare of every critical component on site. The cost of a spare node is nothing compared to a week of downtime.
Northwest Towers supports customers with network engineering, deployment, and managed services, including Network as a Service. That means you get the equipment and the expertise to run it, without building a full internal team.
Frequently Asked Questions
What are the primary causes of wireless signal interference in mines?
Underground mines face interference from multiple sources: heavy machinery motors, blasting operations, rock walls that block or reflect radio signals, and electromagnetic noise from conveyors and ventilation systems. In open-pit operations, dust, extreme temperatures, and signal congestion from overlapping access points add to the problem. Reducing wireless signal interference in mines starts with spectrum analysis before deployment, directional sector antennas to focus coverage, and placing access points to avoid reflective surfaces. Real-time monitoring helps you catch new interference sources before they cause packet loss or dropped connections.
What hardware specifications should rugged networking equipment for mining include?
Mining-grade wireless equipment needs IP67 or higher ratings for dust and water resistance, wide operating temperature ranges (typically -40°F to 140°F), and vibration resistance for mobile equipment mounting. Look for hardware with dual-band or tri-band radios, MIMO support for throughput, and the ability to run on DC power for battery-backed nodes. Mesh-capable access points that support self-healing failover are essential. If you are evaluating vendors, Northwest Towers offers rugged networking equipment built specifically for these conditions, and their team can help match specifications to your site.
How does a mining mesh network maintain connectivity when one node fails?
In a mesh topology, each node connects to multiple others rather than relying on a single uplink. When one access point goes down, traffic reroutes through alternate paths automatically. This is the core of network redundancy in mining. The key is designing the mesh with enough overlapping coverage that no single point of failure isolates a zone. Battery-powered nodes extend the mesh into remote areas where running fiber or power is impractical. Combine mesh failover with real-time monitoring so you know a node dropped before workers report a connectivity gap.
How often should I schedule preventive maintenance for a mine wireless network?
Most mining operations benefit from monthly inspections of access points, antennas, and cabling, quarterly firmware and configuration audits, and annual full-site signal propagation surveys. After blasting events, inspect nearby nodes for physical damage or alignment shifts. In extreme weather months, increase visual checks on outdoor equipment. A written preventive maintenance schedule with assigned owners prevents the common mistake of only reacting to outages. Pair the schedule with uptime reporting so you can prove whether maintenance intervals are actually reducing downtime.
Keeping wireless network uptime in mines is a discipline, not a one-time project. It takes the right design, rugged equipment, and a maintenance culture that treats connectivity as critical infrastructure. Northwest Towers designs and manufactures industrial wireless products built for harsh environments, backed by network design, monitoring, and managed services. Get started with Northwest Towers and build a network that stays online when it matters most.